Complete Server Reset Guide
A comprehensive guide to completely resetting your server to default.
Introduction
This guide will help you reset your Minecraft server to it’s default settings & files.
Prerequisites
- Access to the Kiwi Hosting Panel.
Steps to Reset your Minecraft server
1. Log in to the Kiwi Hosting Billing Panel
- Open your web browser and go to the KiwiHosting Panel.
- Log in with your Kiwi Hosting Billing Panel credentials.
2. Navigate to Your Server
- From the Kiwi Hosting Panel dashboard, select the Minecraft server you want to configure.
- Click on the eye icon of your server to manage its properties.
3. Follow the steps from the tutorial below
Video Guide
Reader Guide
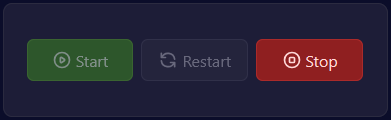
- Stop your server
- In the server management interface, navigate to the File tab.
- Delete all files with the checkbox in the top left of the file manager
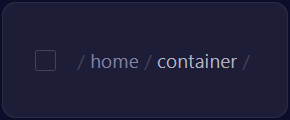
- Turn it to checked state
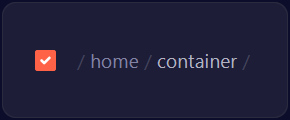
- Delete the files

- Navigate to the Startup tab.
- Set “build number” to “latest”.
- Set “minecraft version” to “latest”.
- Set “server jar file” to “server.jar”.
- Set “docker image/java version” to “Java 21”.
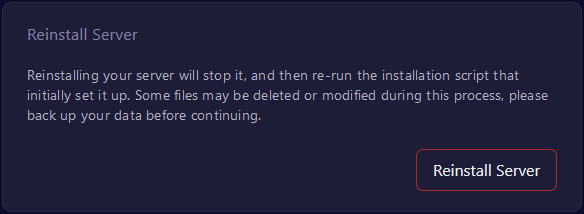
- Navigate to the Settings tab.
- Press the Reinstall Server button.
- Start your server.
Conclusion
By resetting your server, you get a fresh, and brand new start to your server!